
engineering design process worksheet pdf
The Engineering Design Process Worksheet is a structured tool guiding students through problem-solving. It outlines steps from identifying problems to testing solutions, fostering critical thinking and creativity.
It helps organize ideas, document progress, and reflect on outcomes, making it invaluable for STEM education and real-world engineering challenges.
What is the Engineering Design Process?
The Engineering Design Process (EDP) is a structured, iterative method used by engineers to solve problems and create solutions. It involves a series of steps, starting with identifying and defining the problem, followed by researching, brainstorming, planning, prototyping, testing, and refining the solution. This process encourages creativity, critical thinking, and collaboration. It is cyclical, allowing for continuous improvement and adaptation based on feedback and testing results. The EDP is widely used in STEM education and professional settings to develop innovative and practical solutions to real-world challenges. By following this process, individuals can systematically approach complex problems and create effective designs.
Benefits of Using a Worksheet for the Engineering Design Process
Using a worksheet for the Engineering Design Process offers numerous benefits, particularly for students and novice engineers. It provides a clear, structured framework to guide individuals through each step of the problem-solving process, ensuring no critical stage is overlooked. The worksheet helps organize thoughts, document progress, and reflect on outcomes, fostering better understanding and retention. By breaking down the process into manageable sections, it simplifies complex tasks and enhances collaboration. Additionally, it promotes systematic thinking and accountability, as students can track their ideas and revisions. This tool is especially valuable in STEM education, as it prepares learners for real-world engineering challenges by teaching them to approach problems methodically and creatively.
Brief History and Evolution of the Engineering Design Process
The Engineering Design Process (EDP) has evolved from traditional problem-solving methods, becoming a cornerstone in STEM education. Originating in engineering practices, it was formalized to guide systematic problem-solving. Over time, educators adapted it for classroom use, creating structured worksheets to help students navigate each stage. The process has been refined to emphasize iteration and creativity, reflecting the demands of modern engineering. Its evolution includes the integration of digital tools and collaboration, making it adaptable to diverse challenges. Today, the EDP is widely recognized as a foundational skill, with worksheets serving as essential resources for teaching and applying its principles effectively.

Key Components of the Engineering Design Process Worksheet
The worksheet includes sections for problem identification, research, brainstorming, design planning, prototyping, testing, and evaluation. It provides a structured framework for organizing ideas and documenting progress effectively.
Each step guides users through critical thinking and iterative refinement, ensuring a comprehensive approach to solving engineering challenges.
Identify the Problem
The first step in the Engineering Design Process Worksheet is to clearly define the problem. This involves understanding the challenge, identifying stakeholder needs, and determining the goal. Students are prompted to ask, “What are you being asked to achieve?” and “What is the problem we want to solve?” This section emphasizes the importance of justifying the problem—assessing whether it is worth solving. By outlining the problem’s context and constraints, students establish a foundation for the rest of the design process. The worksheet provides structured questions to guide this critical initial phase, ensuring a focused and purposeful approach to problem-solving.
Clear problem identification sets the stage for effective research and innovation.
Research and Gather Information
This step involves collecting data and analyzing existing solutions to better understand the problem. Students are encouraged to investigate stakeholder needs, review similar projects, and identify design criteria and constraints. The worksheet prompts them to consider what limitations might affect their design, such as cost, materials, or time. By gathering relevant information, students build a knowledge base that informs their brainstorming and decision-making. This phase ensures that solutions are grounded in real-world context and user requirements, setting a solid foundation for creative and practical ideas.
Thorough research enables well-informed designs and reduces potential pitfalls.
Brainstorm Possible Solutions
Brainstorming is a critical step where creativity shines. Students generate a wide range of ideas to address the problem, focusing on quantity rather than quality. The worksheet encourages listing all potential solutions, no matter how unconventional. This phase fosters innovation and teamwork, allowing students to explore diverse perspectives. By documenting every idea, they create a robust foundation for the next stages. The goal is to think outside the box and consider various approaches before narrowing them down. This step ensures that no potential solution is overlooked, setting the stage for selecting the most promising designs to develop further.
Plan and Develop a Design
After brainstorming, the next step is to plan and develop a design. Students evaluate and select the most promising ideas from their brainstorming session. They then create detailed sketches or diagrams of their chosen solution, outlining materials, dimensions, and functionality. The worksheet provides space for listing materials and tools needed, as well as considering constraints like cost, time, or environmental impact. This phase encourages students to think critically about their design’s feasibility and scalability. By documenting their plan, students create a clear roadmap for building a prototype, ensuring their vision is actionable and aligned with the problem’s requirements.
Prototype and Test the Solution
Creating a prototype allows students to bring their design to life. Using materials and tools, they construct a model of their solution, ensuring it aligns with the problem’s requirements. Testing the prototype involves evaluating its performance under real-world conditions. The worksheet provides space to document test results, including successes and areas for improvement. Students analyze data to assess whether their solution meets the identified criteria and constraints. This iterative process encourages refinement and innovation, helping students understand the importance of trial and error in engineering. By testing and gathering feedback, they can identify weaknesses and make necessary adjustments to enhance their design.
Evaluate and Refine the Design
Evaluating the design involves assessing its effectiveness in solving the problem. Students compare their solution against the established criteria and constraints, identifying strengths and shortcomings. The worksheet helps document this analysis, ensuring a clear understanding of what works and what needs improvement. Based on feedback and test results, students refine their design by modifying materials, structures, or features. This step emphasizes critical thinking and problem-solving, teaching students to iterate until they achieve a viable solution. Refinement is crucial for optimizing functionality, efficiency, and user satisfaction, making it a cornerstone of the engineering design process.
Implement and Present the Final Solution
Once the design is refined, it is implemented, and the final solution is presented. This step involves constructing the final prototype and preparing a detailed presentation. Students document their design process, including challenges faced and lessons learned. The presentation highlights the solution’s effectiveness in addressing the problem, adhering to criteria and constraints. Peer review and feedback are often incorporated to validate the solution. This step emphasizes clear communication and the ability to articulate the design’s value. The final presentation serves as a culmination of the engineering design process, showcasing creativity, problem-solving skills, and collaboration.
Steps of the Engineering Design Process
The Engineering Design Process involves structured steps to solve problems, fostering innovation and critical thinking. It guides students through defining problems, researching, brainstorming, prototyping, testing, and refining solutions.
Step 1: Define the Problem
Defining the problem is the foundational step in the Engineering Design Process. It involves clearly identifying the challenge or need that requires a solution. Students are encouraged to ask questions like, “What is the goal?” and “What are we trying to achieve?” This step ensures that the problem is well understood before moving forward. The worksheet provides space to document the problem, helping to clarify the objectives and constraints. By focusing on defining the problem accurately, students can set a clear direction for their design process, ensuring that their solutions are relevant and effective.
Accurately defining the problem sets the stage for a successful engineering design process.
Step 2: Conduct Research
Conducting research is a critical step in the Engineering Design Process. It involves gathering information to understand the problem deeply. Students use resources like books, online articles, and expert interviews to collect data. The worksheet provides sections to document findings, ensuring organized and relevant information. Research helps identify design criteria, constraints, and stakeholder needs. By exploring existing solutions, students can uncover gaps and opportunities for innovation. This step also involves analyzing data to inform brainstorming and design decisions. Effective research lays the groundwork for creating practical and effective solutions.
Research equips students with the knowledge needed to develop well-informed designs.
Step 3: Generate Ideas
Generating ideas is a creative phase where students brainstorm potential solutions to the identified problem. The worksheet encourages wild, imaginative thinking without judgment. Collaboration is key, as students share and build on each other’s ideas. The goal is to explore a wide range of possibilities, ensuring no idea is dismissed too early. The worksheet provides space to list or sketch concepts, organizing them for later evaluation. This step fosters innovation and prepares students to narrow down options based on criteria and constraints. By encouraging diverse thinking, students develop a robust foundation for their design.
Brainstorming in this step is essential for uncovering innovative and practical solutions.
Step 4: Create a Prototype
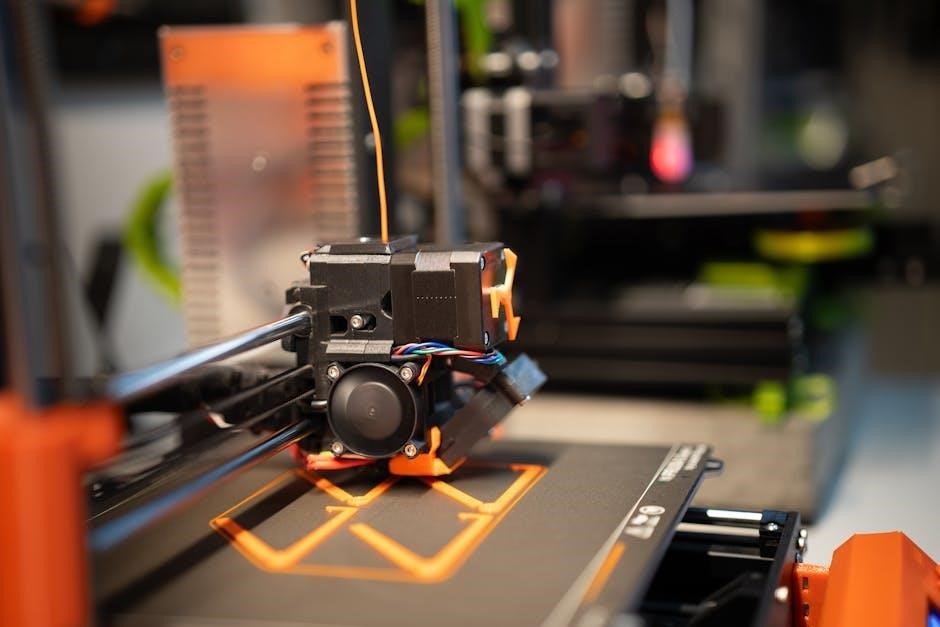
Creating a prototype involves building a physical or digital model of the chosen design solution. This step allows students to test the functionality and feasibility of their idea. Using materials like cardboard, 3D printing, or software simulations, students bring their design to life. The worksheet guides students to document their prototype’s features and purpose. Prototyping helps identify potential flaws and areas for improvement. It is a hands-on way to gather feedback and refine the design further. The worksheet encourages students to iterate and test multiple versions, ensuring a well-rounded solution. This practical step bridges creativity and technical skills, preparing students for real-world engineering challenges.
Prototyping is a critical step where ideas transition from concept to tangible solutions.
Step 5: Test and Evaluate
Testing and evaluating involve assessing the prototype to ensure it meets the defined criteria and constraints. Students use the worksheet to document test results, identifying strengths and weaknesses. This step involves gathering feedback from peers or stakeholders to refine the design further. The worksheet guides students to analyze data, measure performance, and determine if the solution effectively addresses the problem. If the prototype fails, students reflect on what went wrong and propose improvements. This iterative process ensures the final solution is robust, functional, and aligned with the original goal. Testing and evaluation are crucial for validating the design and preparing it for implementation.
This step ensures the solution is thoroughly assessed and refined for optimal performance.
Step 6: Iterate and Improve
Iteration is a critical part of the engineering design process, where students refine their design based on feedback and test results. The worksheet encourages reflection on what worked well and what didn’t, guiding students to make necessary adjustments. This step involves retesting the revised prototype and documenting any improvements. Iteration helps students understand that design is not a one-time event but a continuous process of refinement. By revisiting earlier steps, students enhance their problem-solving skills and develop a more effective solution. The worksheet ensures that students systematically track changes and justify design decisions, leading to a polished final product.
Iteration fosters resilience and creativity, essential for successful engineering outcomes.

Importance of the Engineering Design Process Worksheet
The worksheet is essential for organizing thoughts, documenting progress, and enhancing problem-solving skills. It provides a clear framework for STEM challenges, fostering creativity and systematic thinking.
It ensures students reflect on their designs and improve iteratively, preparing them for real-world engineering scenarios.
Why Use a Worksheet?
Using an Engineering Design Process Worksheet provides a structured approach to problem-solving, ensuring clarity and organization. It helps students break down complex tasks into manageable steps, fostering critical thinking and creativity. The worksheet serves as a visual guide, making it easier to track progress and reflect on decisions. By documenting each stage, from identifying the problem to testing solutions, students can better understand the design process. It also encourages accountability and systematic thinking, preparing learners for real-world engineering challenges. Additionally, the worksheet facilitates collaboration, ensuring all team members are aligned and contribute effectively to the project.
How It Enhances Problem-Solving Skills
The Engineering Design Process Worksheet enhances problem-solving skills by providing a structured approach to addressing challenges. It encourages students to break down complex problems into manageable steps, fostering critical thinking. By guiding learners through research, brainstorming, and prototyping, the worksheet promotes a systematic and iterative mindset. This process helps develop creativity, as students explore multiple solutions and refine their ideas. The worksheet also teaches resilience through testing and iteration, emphasizing that failure is an opportunity for improvement. By documenting each stage, students refine their analytical and reflective skills, leading to more effective and innovative solutions. It prepares them for real-world challenges by simulating professional engineering practices.
Its Role in STEM Education
The Engineering Design Process Worksheet is integral to STEM education, providing a structured framework for students to engage in authentic engineering practices. It aligns with standards like NGSS, emphasizing problem-solving and innovation. By guiding students through problem identification, research, brainstorming, prototyping, and testing, the worksheet fosters critical thinking and creativity. It encourages hands-on learning, allowing students to apply scientific and mathematical concepts to real-world challenges. The iterative nature of the process teaches perseverance and adaptability, mirroring professional engineering workflows. This tool bridges classroom theory with practical application, equipping students with essential skills for future STEM careers and inspiring the next generation of innovators and problem solvers.
How to Use the Engineering Design Process Worksheet
The worksheet guides students through each step, from identifying the problem to testing solutions. It provides structured sections for brainstorming, planning, and documenting progress, ensuring a comprehensive approach.
Step-by-Step Guide for Students
The Engineering Design Process Worksheet provides a clear, structured approach for students to tackle challenges. Begin by identifying the problem and defining its criteria and constraints. Next, conduct research to gather relevant information and brainstorm potential solutions. Use the worksheet to plan and sketch your design, ensuring it meets the established requirements. Create a prototype and test it, documenting the results. Analyze the data to evaluate your solution’s effectiveness. Reflect on the design, identifying areas for improvement, and iterate as needed. Finally, present your refined solution, showcasing your problem-solving process and outcomes. This guide ensures a systematic and effective approach to engineering challenges.
Examples of Successful Projects
Successful projects using the Engineering Design Process Worksheet include designing a solar-powered water filtration system for remote communities and creating an efficient recycling sorter. These projects demonstrate how the worksheet guides students through problem identification, research, brainstorming, prototyping, and testing. For instance, a group of students used the worksheet to develop a low-cost prosthetic limb, iterating through multiple prototypes based on user feedback. Another example is a team that designed a sustainable birdhouse using recycled materials, showcasing the effectiveness of the design process in environmental solutions. These examples highlight how the worksheet facilitates innovative and practical problem-solving in real-world scenarios.
Tips for Effective Collaboration
Effective collaboration is crucial when using the Engineering Design Process Worksheet. Define roles clearly to ensure each team member understands their responsibilities. Communicate openly and actively listen to ideas, fostering a respectful environment. Use visuals like sketches or diagrams to share concepts effectively. Set milestones to track progress and stay organized. Encourage iteration by embracing feedback and refining ideas together. Document discussions to reference decisions later. These strategies enhance teamwork, ensuring a cohesive and successful design process. Collaboration strengthens problem-solving skills and prepares students for real-world engineering challenges.
Common Mistakes to Avoid
When using the Engineering Design Process Worksheet, avoid skipping steps or rushing through the process. Not defining the problem clearly can lead to misaligned solutions. Overlooking constraints may result in impractical designs. Insufficient testing can cause unforeseen issues. Ignoring feedback hinders improvement. Rushing brainstorming limits creative solutions. Communication gaps within teams lead to confusion. Not documenting progress makes it harder to track changes. Avoiding these pitfalls ensures a smoother, more effective design process. By being methodical and collaborative, students can create innovative and practical solutions to real-world problems.
Challenges in the Engineering Design Process
Managing time and resources effectively is crucial. Design failures can occur, requiring iterative improvements. Balancing creativity with constraints often presents difficulties. Collaboration and communication within teams are essential to overcome these challenges successfully.
Overcoming Design Failures
Design failures are inevitable but serve as valuable learning opportunities. Engineers must analyze what went wrong and identify areas for improvement. Iterating on the design, based on test results and feedback, is crucial. Reflecting on the failure helps refine the solution and ensures it meets the defined criteria and constraints. Using the worksheet, students can document their failures and track revisions systematically. This process fosters resilience, critical thinking, and problem-solving skills. By embracing failure as part of the engineering design process, students learn to approach challenges with a growth mindset and develop robust, effective solutions.
Managing Time and Resources
Effective management of time and resources is essential for successful engineering projects. The worksheet helps allocate tasks and set deadlines, ensuring each step of the design process is completed efficiently. By prioritizing activities and assigning roles, teams can optimize resource use. Regular reviews and adjustments keep projects on track, preventing delays. Balancing limited materials and time constraints while maintaining design quality is a key skill. The worksheet guides students to plan realistically, minimizing waste and maximizing productivity, which are critical in real-world engineering scenarios.

Tools and Resources for the Engineering Design Process
The Engineering Design Process utilizes various tools, including CAD software, prototyping materials, and online resources like TeachEngineering.org and VivifySTEM.com, to facilitate effective design development.
Software and Digital Tools
Software and digital tools play a crucial role in the Engineering Design Process. CAD software, such as Fusion 360 or AutoCAD, enables precise modeling and simulation. Tools like Trello or Asana help manage workflows, while online platforms like TeachEngineering.org offer downloadable templates. Digital resources provide interactive guides and worksheets, facilitating each step of the process. These tools enhance collaboration, streamline design iterations, and allow for real-time feedback. By leveraging these technologies, engineers and students can create, test, and refine their designs efficiently, ensuring innovation and precision in problem-solving. Digital tools are essential for modern engineering, making the design process more accessible and effective.
Physical Prototyping Materials
Physical prototyping materials are essential for bringing designs to life. Common materials include cardboard, foam, wood, 3D printing filament, and craft supplies. These tools allow hands-on testing and iteration, helping refine ideas. Students often use everyday items to create tangible models, making abstract concepts concrete. Access to these materials fosters creativity and practical problem-solving skills. They are integral to STEM education, enabling students to test and refine their designs effectively. Physical prototyping materials bridge the gap between theoretical planning and real-world application, making the engineering design process interactive and engaging. They are indispensable for transforming ideas into functional solutions.
Online Resources and Tutorials
Online resources and tutorials provide valuable support for the engineering design process. Websites like TeachEngineering.org and VivifySTEM.com offer comprehensive guides, worksheets, and activities. These resources include video tutorials, step-by-step instructions, and interactive simulations to enhance learning. Many platforms provide downloadable PDFs, such as engineering design process worksheets, to help students organize their projects. Additionally, webinars and online courses are available to deepen understanding of design thinking and problem-solving. These tools are especially useful for STEM education, enabling students to explore real-world applications and refine their skills in a structured manner. They serve as essential aids for both educators and learners.
The Engineering Design Process Worksheet PDF empowers students to approach problems methodically, fostering creativity, critical thinking, and collaboration. It serves as a valuable tool for STEM education, ensuring comprehensive understanding and successful project outcomes.
Final Thoughts on the Engineering Design Process
The Engineering Design Process is a cornerstone of STEM education, equipping students with problem-solving skills. Worksheets provide structured guidance, enhancing understanding and application of each step, from identifying problems to presenting solutions. They promote iterative thinking, collaboration, and innovation, preparing students for real-world challenges. By following this process, students develop resilience and adaptability, essential for future engineers. The worksheet’s clarity and organization make it an invaluable resource for fostering creativity and critical thinking, ensuring students grasp the engineering mindset and apply it effectively.

Additional Resources
Explore free PDFs and guides on the Engineering Design Process Worksheet from TeachEngineering.org and VivifySTEM.com for comprehensive learning and application.
Recommended Reading
For deeper insight, download the Engineering Design Process Worksheet from STEM Education Guide. This 20-page PDF provides detailed steps, examples, and practical exercises. Additionally, explore the Engineering Design Process: Middle School Worksheet for age-specific guidance. These resources are ideal for educators and students seeking structured frameworks to enhance problem-solving skills. They include templates, real-world applications, and tips for effective collaboration, making them invaluable for STEM-based learning and project execution.
Useful Websites
Visit TeachEngineering.org for a comprehensive Engineering Design Process Worksheet and related activities. Explore VivifySTEM.com for STEM challenges and detailed process guides. Additionally, EGFI-K12.org offers lesson plans and resources aligned with the engineering design process. These websites provide practical tools, templates, and educational materials to enhance understanding and application of the engineering design process in both academic and professional settings.